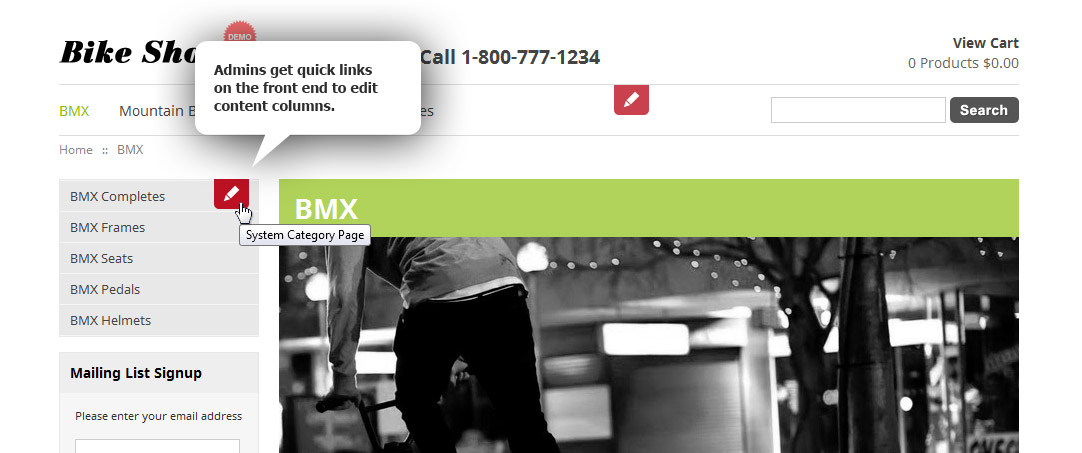
Content Columns are nothing new to BV Commerce; they've been part of the platform since the 5.0 release. You've probably used them to edit the homepage, the left columns of the product and category pages, and even the admin dashboard. A Content Column is simply an admin-editable region of a page where you can add any number of Content Blocks. BV Commerce includes many different kinds of Content Blocks such as Category Menu, Product Grid, Mailing List Signup, and Html. Take a look at the screenshot below of a category page on the demo store. The highlighted area is the "System Category Page" Content Column. In BV Commerce 2013 we added a red edit button (with a pencil icon) to make it easy to edit a Content Column from the front end of the site.
The Content Columns included out-of-box will get you started, but the real power of Content Columns comes when you create your own. You can add a Content Column to any page of your site wherever you want easily editable and dynamic content. The placement of these Content Columns can be as granular as you wish. Meaning, a Content Column can appear on every page of your site, just a single page, or anything in between.
Using our Bike Shop demo store as the example, let's say that we want to run a sale on helmets. To properly promote this sale to customers we need to tell them about the sale on the helmets category page and the product page of each helmet (and probably the homepage, too, but I'm going to assume that you already know how to edit your homepage).
Creating a New Content Column
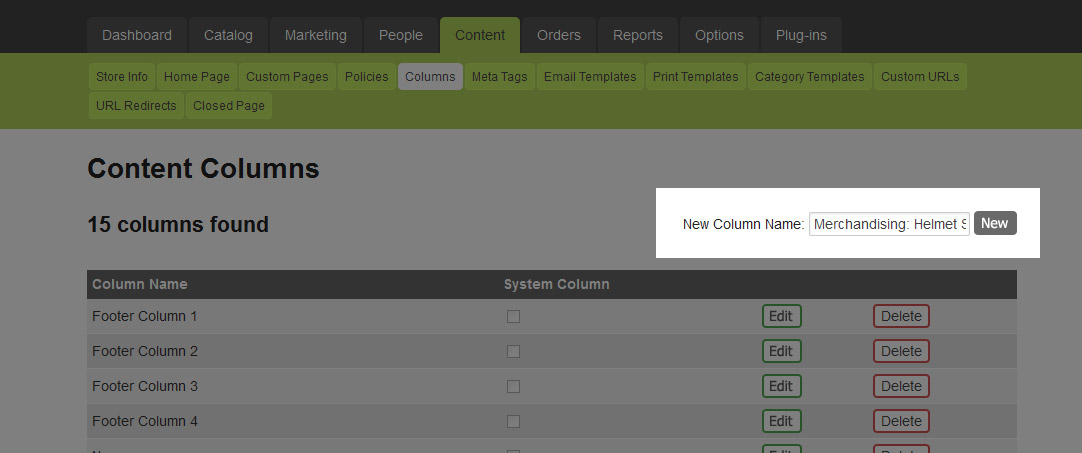
In the admin, go to Content >> Content Columns. Enter the name of your new Content Column in the text box in the upper-right corner of the page and click the New button. Choose a name that is easy to identify once you have a large number of Content Columns. In the screenshot below I called my column "Merchandising: Helmet Sale".
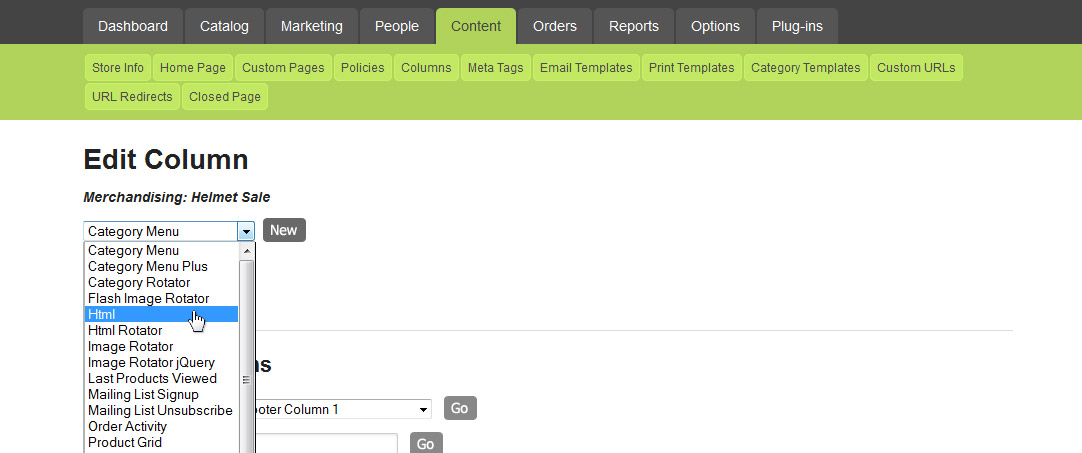
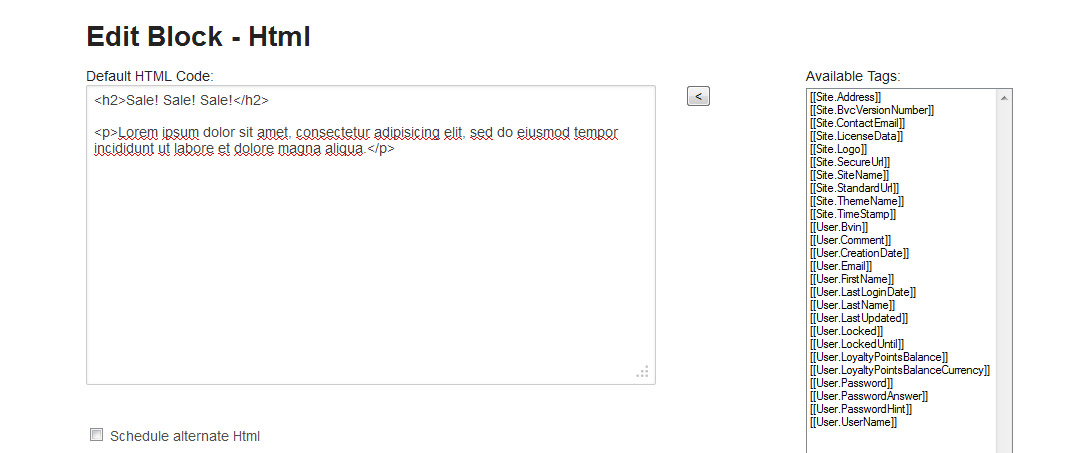
Now add a Content Block to your newly created Content Column by selecting one from the dropdown box and clicking the New button. In the screenshot below the Content Block that I chose to add was Html.
Click the Edit button of your Html Content Block.
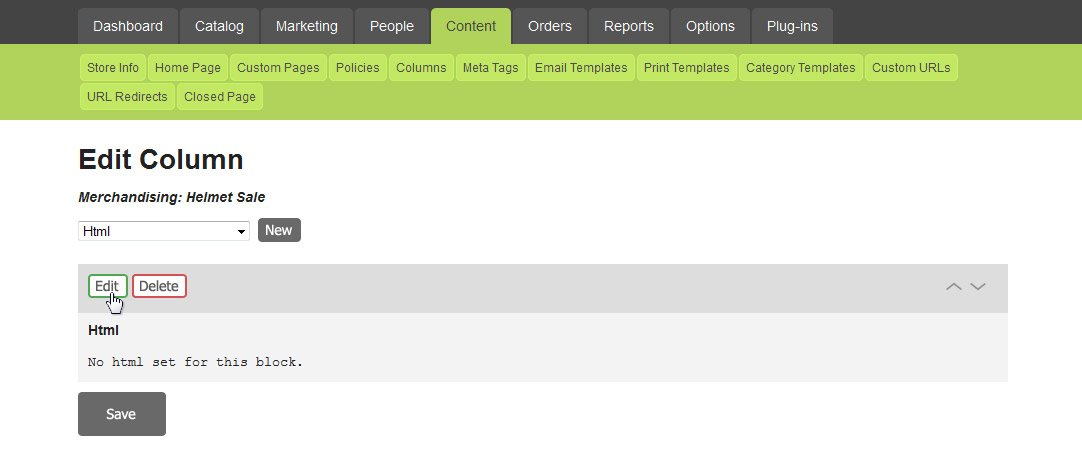
Enter some text & HTML into the box to promote the sale and click the Save button.
Congratulations! Your new Content Block has been setup and is ready to be added to some pages on your site.
Adding a Content Column to a Product, Category, or Custom Page
It's easy to add a Content Column to a specific product, category, or custom page. Each of these have two areas on the page where you can assign your Content Column. These areas are called the Pre-Content Column and Post-Content Column. As you've probably gathered by their names, the Pre-Content Column appears before the main page content and the Post-Content Column appears after it. Note, however, that their placement on the page can vary depending on the product, category, or custom page template that you're using.
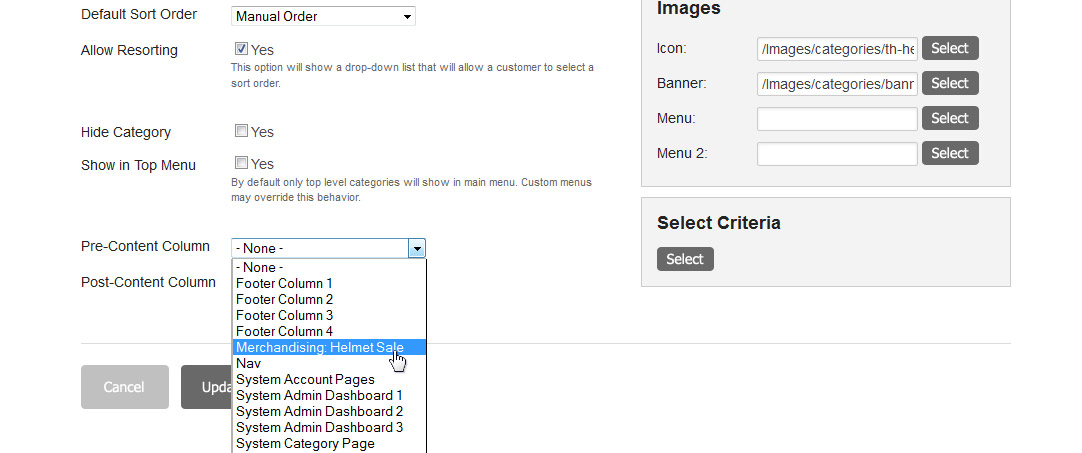
Getting back to the Bike Shop demo store example, let's add our new Content Column to the helmets category by editing the Helmets category (Accessories >> Helmets) and select "Merchandising: Helmet Sale" from the Pre-Content Column dropdown.
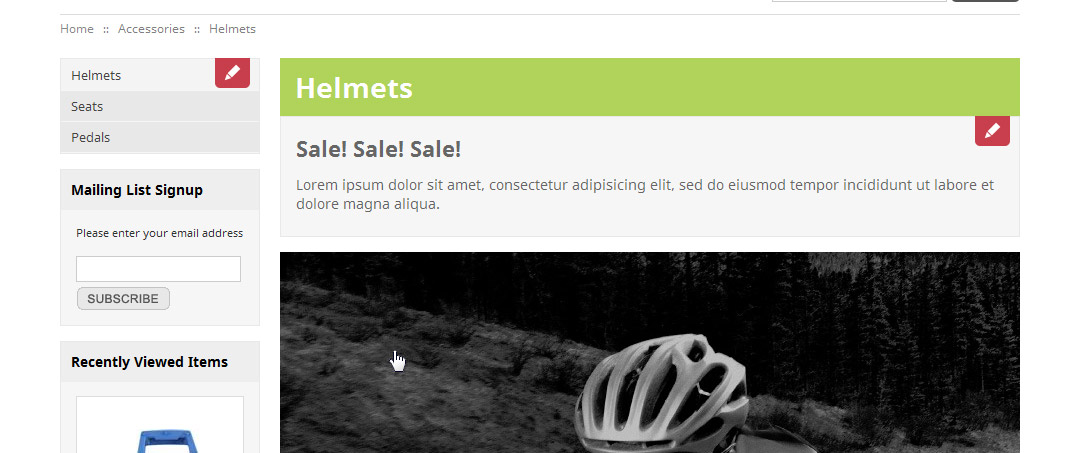
Click the Update button to save your work and then click the View in Store button at the top of the page to see what the helmets category page looks like with the Content Column in place. It should look something like this:
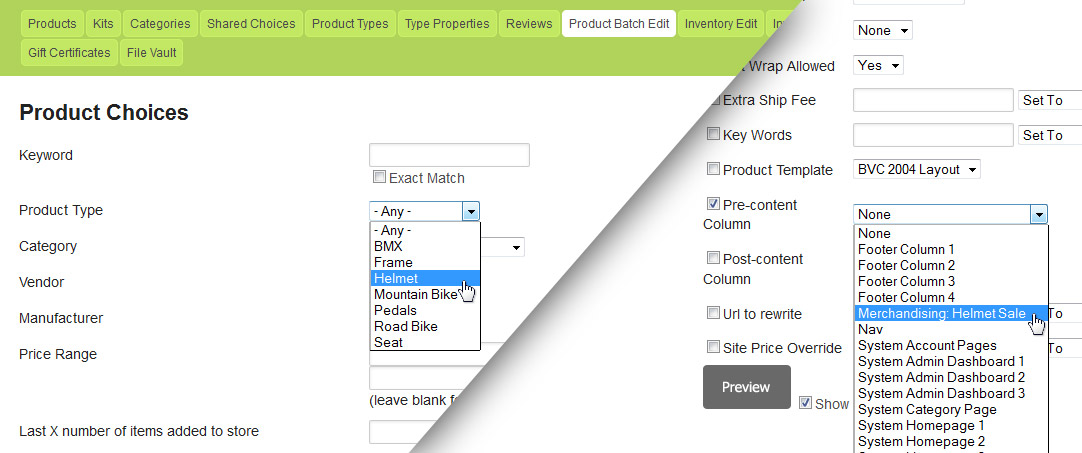
To add the Content Column to the helmet product pages you follow the same basic process for each product (i.e. edit each helmet product and assign the Pre-Content Column). This can quickly become tedious, especially on larger stores. Fortunately there is a way to quickly automate this process using the Product Batch Editing feature in the admin (Catalog >> Product Batch Editing). Under the Product Choices heading select "Helmet" from the Product Type dropdown. Scroll down the page under the Product Modifications heading. Check the box next to Pre-Content Column and select "Merchandising: Helmet Sale" from the dropdown.
Click the Preview button to review your batch changes before they are made (NOTE: you cannot undue these changes once they are made). Once you're satisfied that these changes are correct, click the Save button to apply them.
Adding a Content Column Anywhere
In the section above we covered how you can add a Content Column to individual product, category, and custom pages. But what if we want to use that Content Column on more pages or even the entire site? You can! Here are the typical usage 'scopes' and some real-world usage examples:
| Scope | Location | Usage Examples |
|---|
| Single, Static Pages |
e.g. Cart.aspx, ContactUs.aspx, etc |
Display most popular accessories on cart, create admin-editable area on a page |
| Groups of Product, Category, or Custom Pages |
Templates |
Sale/promo banner |
| Every Product, Category, or Custom Page |
Theme Master Pages |
Sale/promo banner |
| Site-wide |
Theme Header, Footer, or Master Pages |
Sale/promo banner, emergency messaging, admin-editable header or footer |
Taking advantage of this flexibility requires a little more effort than our helmet sale. In that example we made use of an existing Content Column location, Pre-Content Column, and simply selected which Content Column to use in that location via the admin. To create a new Content Column location we'll need to get our hands dirty with some HTML.
We'll continue our helmet sale example by adding this Content Column site-wide. To do this we'll need to edit the header control (Header.ascx) of your theme using a text editor of your choice. Theme files are located in /BVModules/Themes/YOUR-THEME-NAME/. You should see the header control in that folder or a sub-folder called "controls" (i.e. /BVModules/Themes/YOUR-THEME-NAME/controls/), If your theme does not use a header control then you will need to make these changes to every master page (files with a ".master" extension) in your theme folder except Popup.master.
With the header control open take a look at the "Register" directive(s) at the top of the file. Check to see if the ContentColumn control has already been registered. If it has, it should look something like this (though the TagPrefix may have a number after it, like "uc4"):
<%@ Register Src="~/BVModules/Controls/ContentColumnControl.ascx" TagName="ContentColumnControl" TagPrefix="uc" %>
If you do not see something like this then you will need to add it. This registers the ContentColumn control with the page so it can be used. Next decide where you want to place your Content Column in the header. Once you've selected a spot enter the following:
<uc:ContentColumnControl runat="server" ColumnName="Merchandising: Helmet Sale" />
When the page loads this control tag will be replaced by the Content Column that you specified in the ColumnName attribute. Note that if your file already had the ContentColumn control registered and the TagPrefix value was different than our example you will need to use that TagPrefix value rather than the "uc" prefix that we used above.
Think About Content Columns When Creating a Theme or Template
By now you're probably thinking about all of the great things that you can accomplish with Content Columns. The trick, however, is to plan for them when you're building your theme and templates. For example, think about how you'll use Pre-Content Columns on product pages and design your product templates accordingly. Also, if you're going to use Content Columns for sale/promo banners save yourself some effort by standardizing the size of your Content Columns across product, category, and custom pages. Then you can use a single Content Column for all of these pages rather than creating a different Content Column for each size.