Posted by Aaron on May 29, 2024
Comments (0)
The following document will walk you through the steps to setup UPS OAuth credentials for use with the UPS rating and shipping APIs. BV Commerce uses these APIs to get real-time rates and generate shipping labels for UPS. BV Commerce 2017 and above is required to use UPS OAuth credentials (which are now required by UPS to use their APIs). BV Commerce 2020 and below require installation of the OAuth update.
1. Login to your UPS account
Login to your UPS account or, if you don't already have an account, click the 'sign up' link from the login page to create a new account. Note that if you wish to use negotiated rates (i.e. special rates for your account) you must login to the UPS account that's associated with your UPS shipping account.
2. Setup BV Commerce 'app' on the UPS Developer site
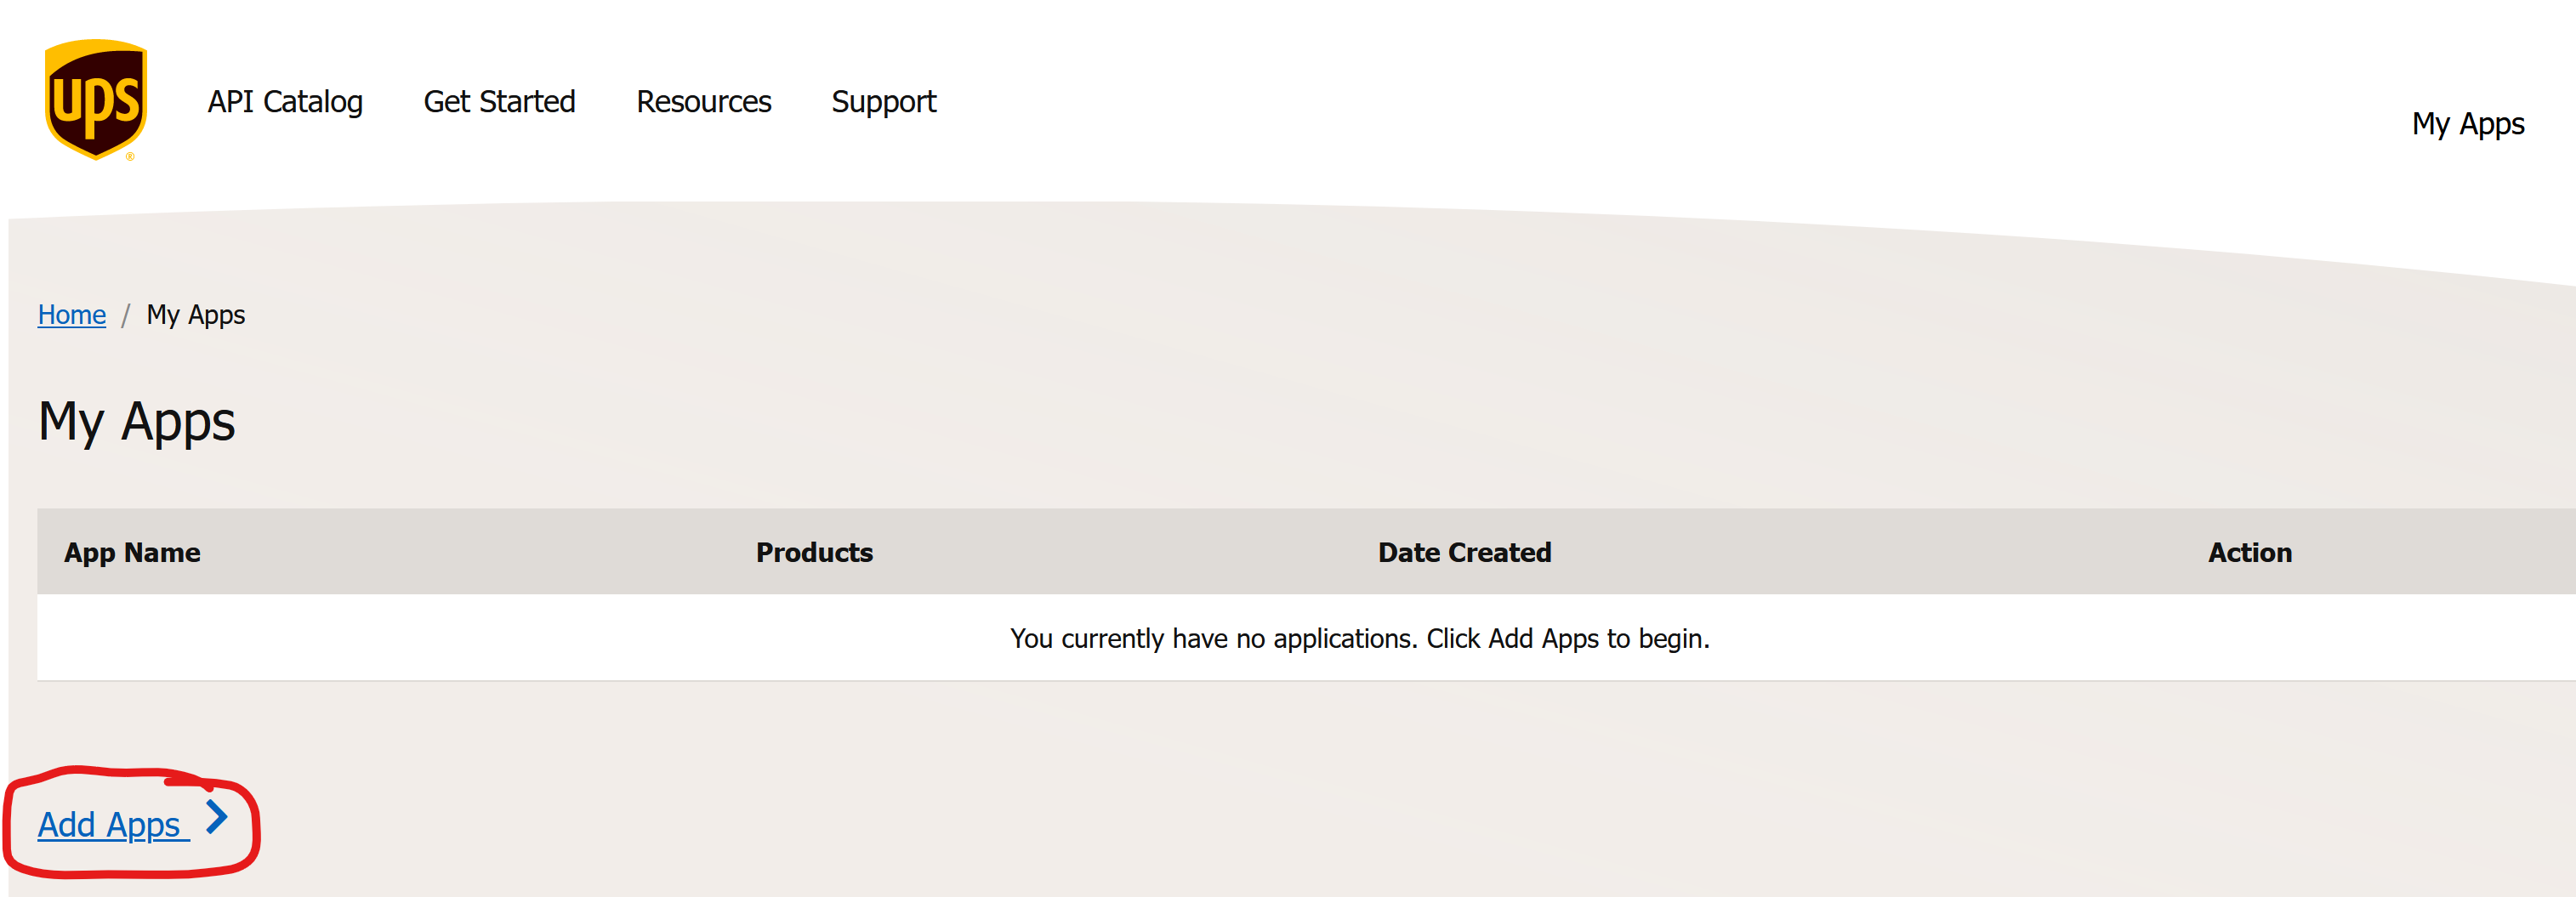
After logging into your account, go to the Apps page on the UPS Developer site. You may need to agree to the terms & conditions before proceeding to the Apps page. At the time of this writing (5/29/2024) the Apps page does not work properly in Google Chrome so we recommend using Firefox. You should see a blank list of apps like the screenshot below unless you've previously setup credentials for an app other than BV Commerce. If you see BV Commerce listed then you have already completed this step and should skip to Step #3. If BV Commerce does not appear in the list, click the "Add Apps >" link as shown in the screenshot below.
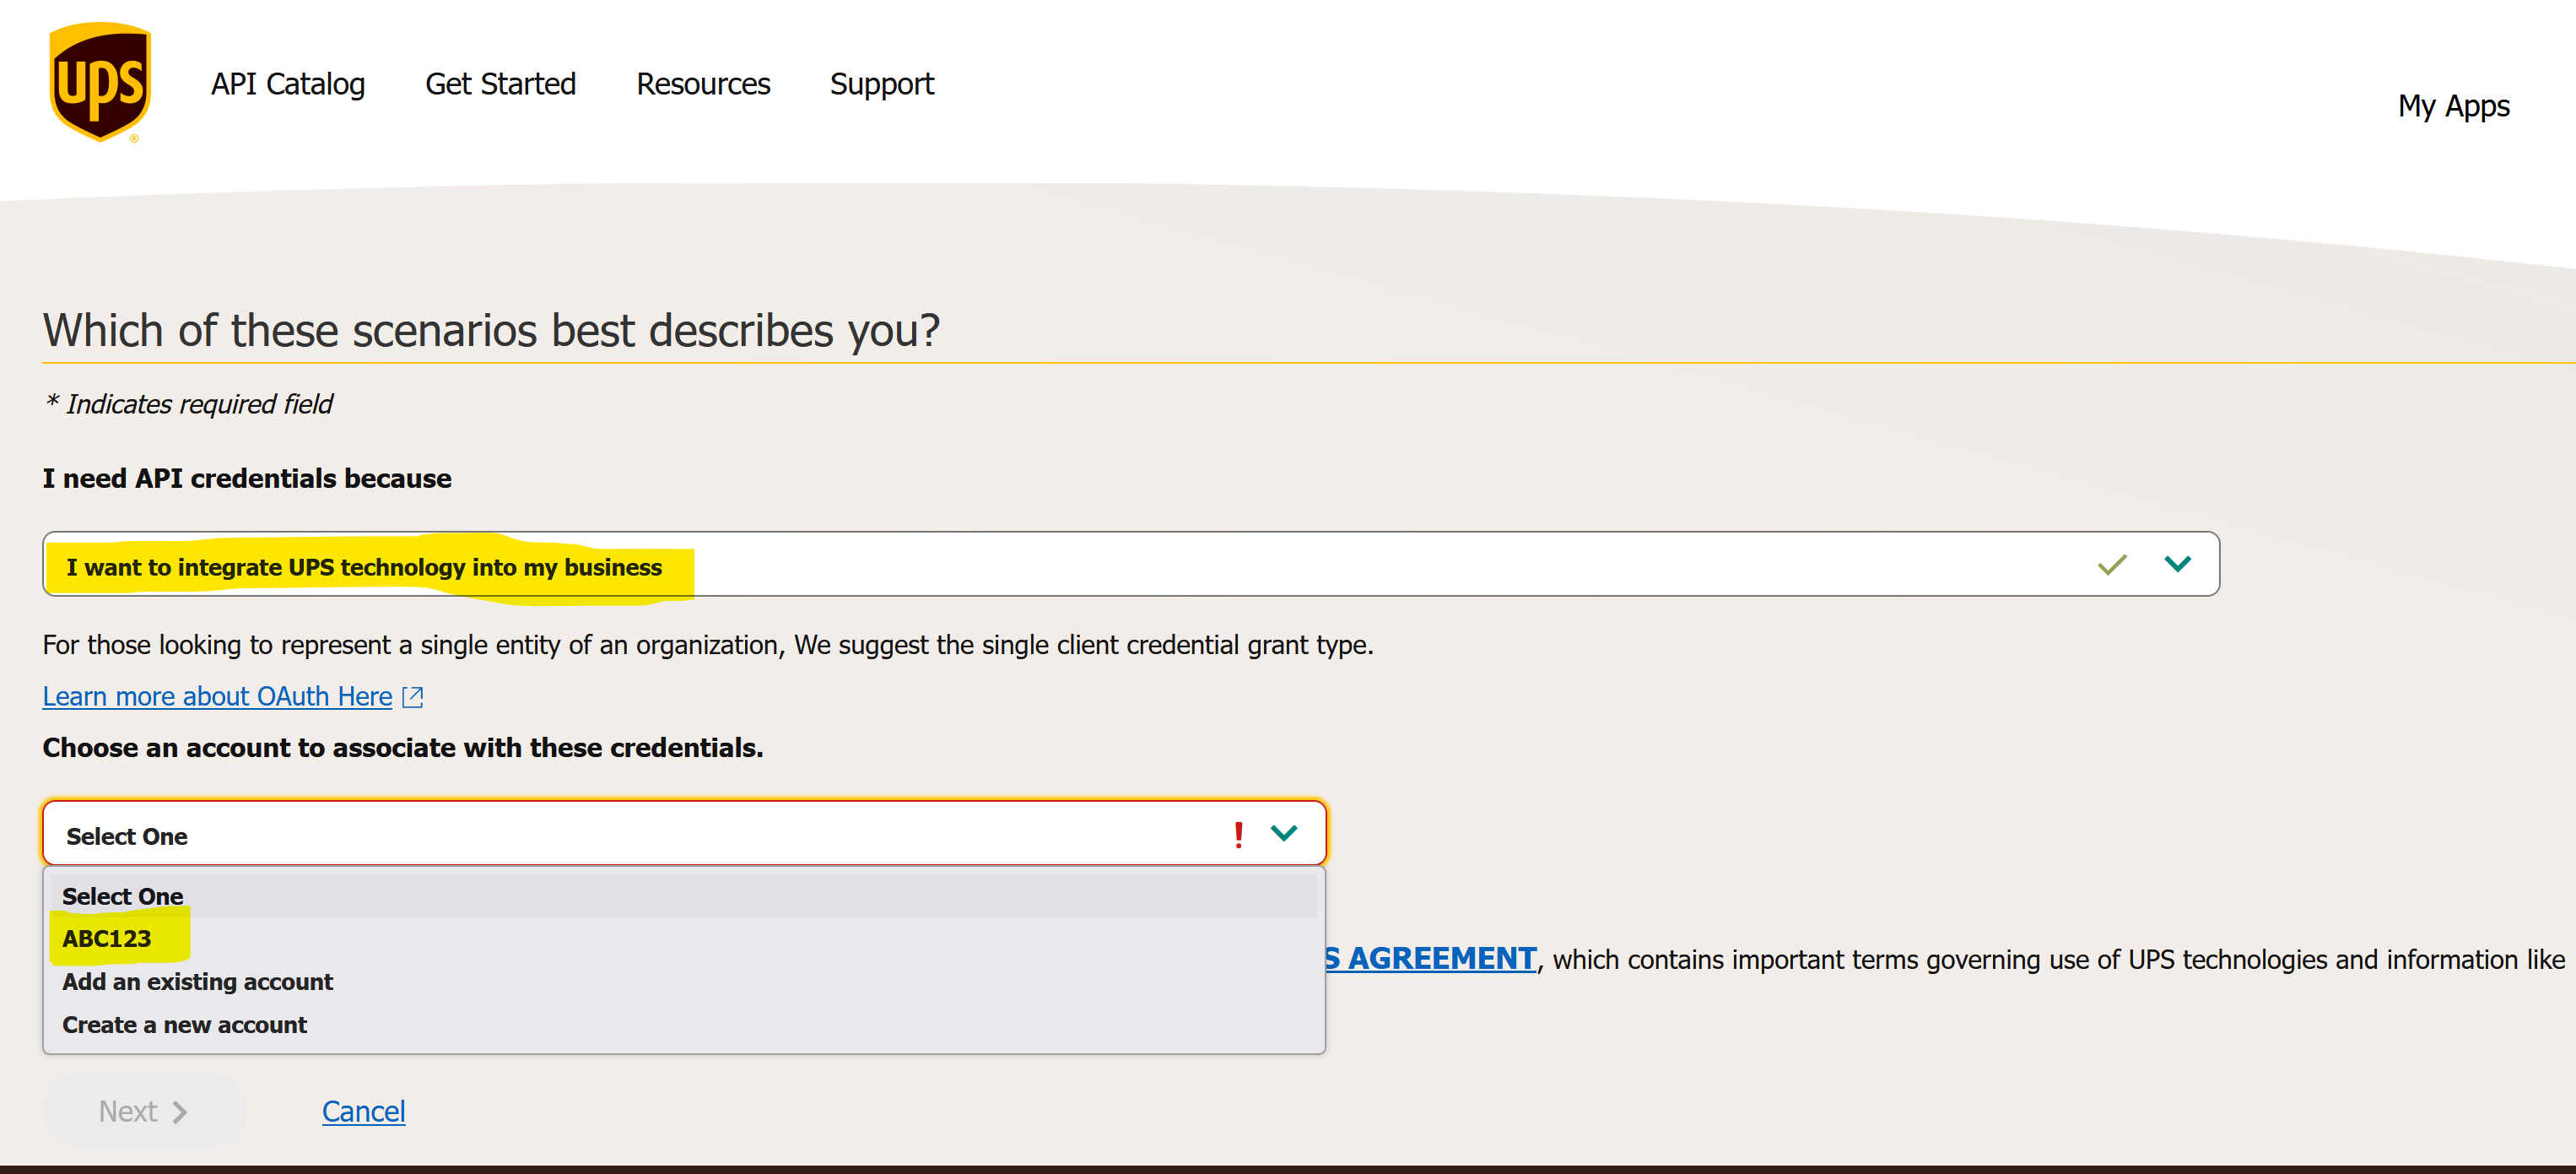
On the next screen you are presented with two questions via dropdowns and a checkbox. The screenshot below shows how you should answer the dropdown questions. For the "I need API credentials because" dropdown select "I want to integrate UPS technology into my business". The second dropdown for "Choose an account to associate with these credentials" should show your UPS shipper account number if you have one and are logged into the UPS account associated with your shipper account. If you have one but it is not shown, select "Add an existing account", or if you don't have a shipping account select "Create a new account". Finally, check the box to agree to the UPS API Access Agreement and click the yellow button to proceed. Complete the following screen with the appropriate information for your business.
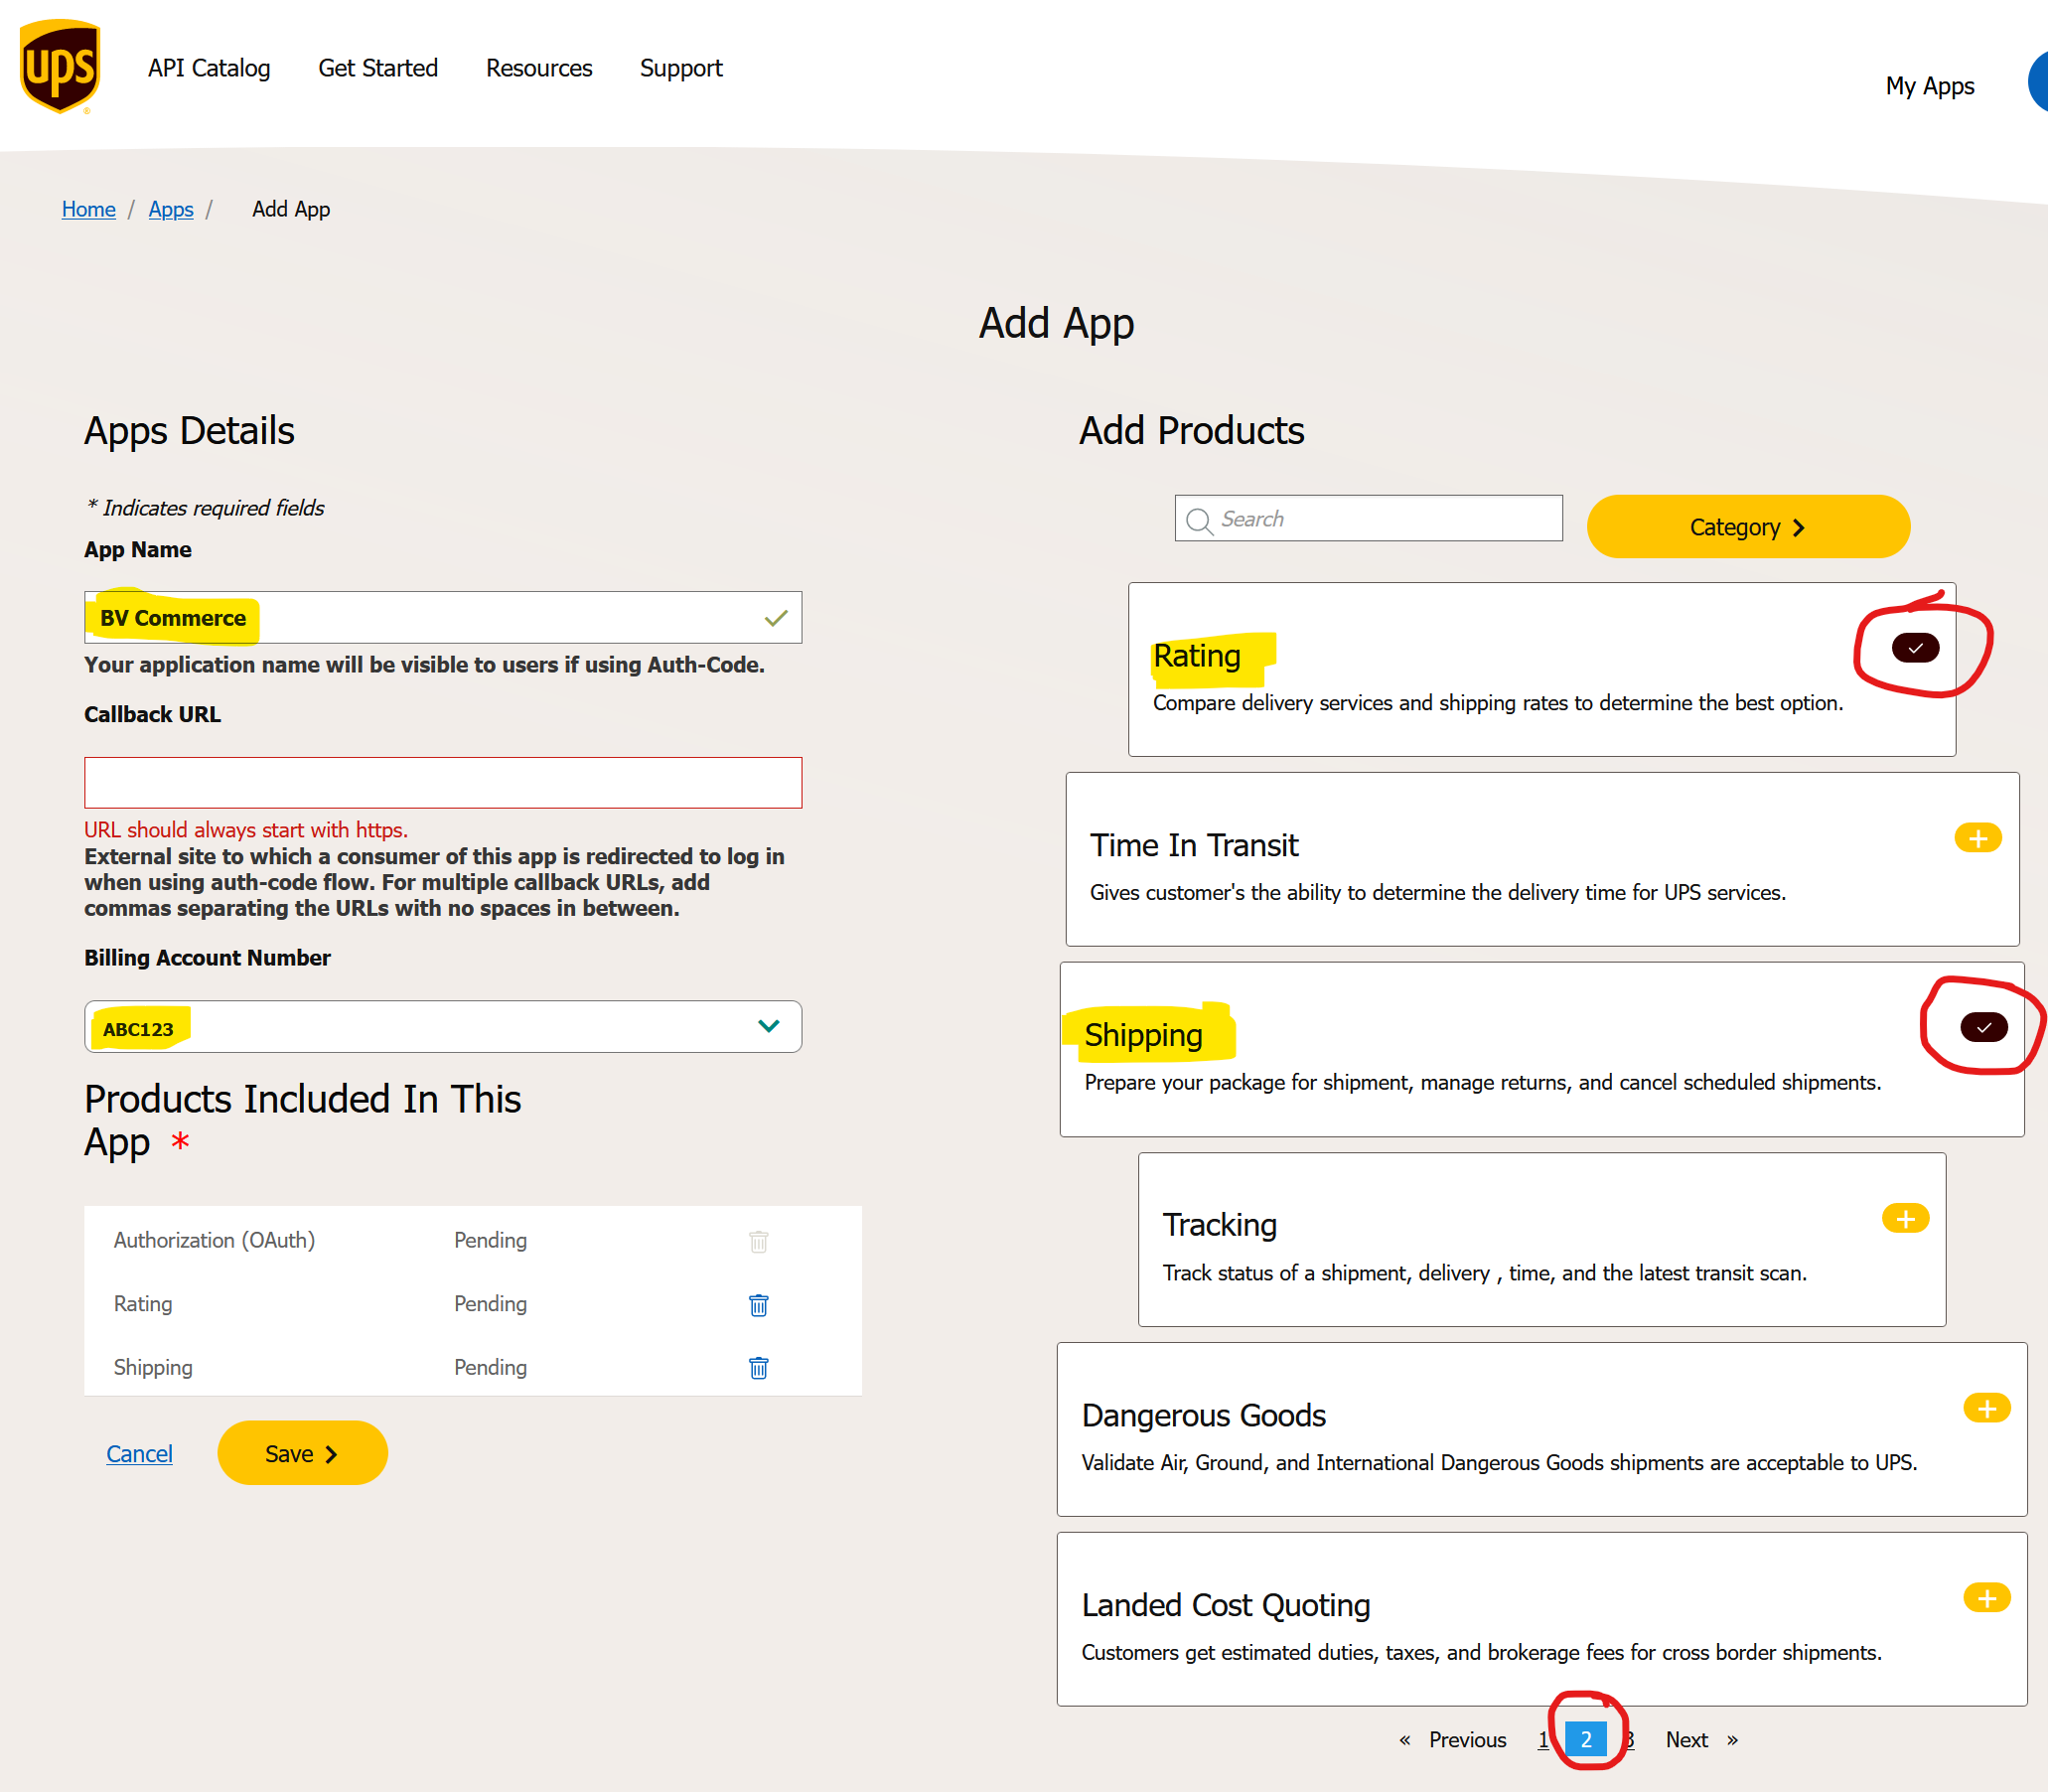
On the next screen (Apps Details) there are a number of fields to complete as shown in the screenshot below. Start by entering "BV Commerce" into the App Name field. Leave the Callback URL field blank. The Billing Account Number field should be pre-populated with your UPS account number. The right side of the screen lists the API 'products' in a paged list. You must click the "+" button on the "Rating" and "Shipping" products to add them to your account. As of this writing (5/24/2024) these products are found on the second page of the products list so you will need to click the "2" link at the bottom to load the second page of products. Once you've added the Rating and Shipping products they should appear in the table to the left along with Authorization (OAuth) as shown in the screenshot below.
3. Copy/Paste the Client ID and Client Secret into BV Commerce admin
You should now be presented with the App Info/Credentials page for the BV Commerce app you created (see screenshot below). Now you must copy/paste the Client ID and Client Secret into the BV Commerce admin. Click the clipboard icon next to the Client ID to copy it. Paste this into BV Commerce (see details below screenshot). Repeat for the Client Secret.
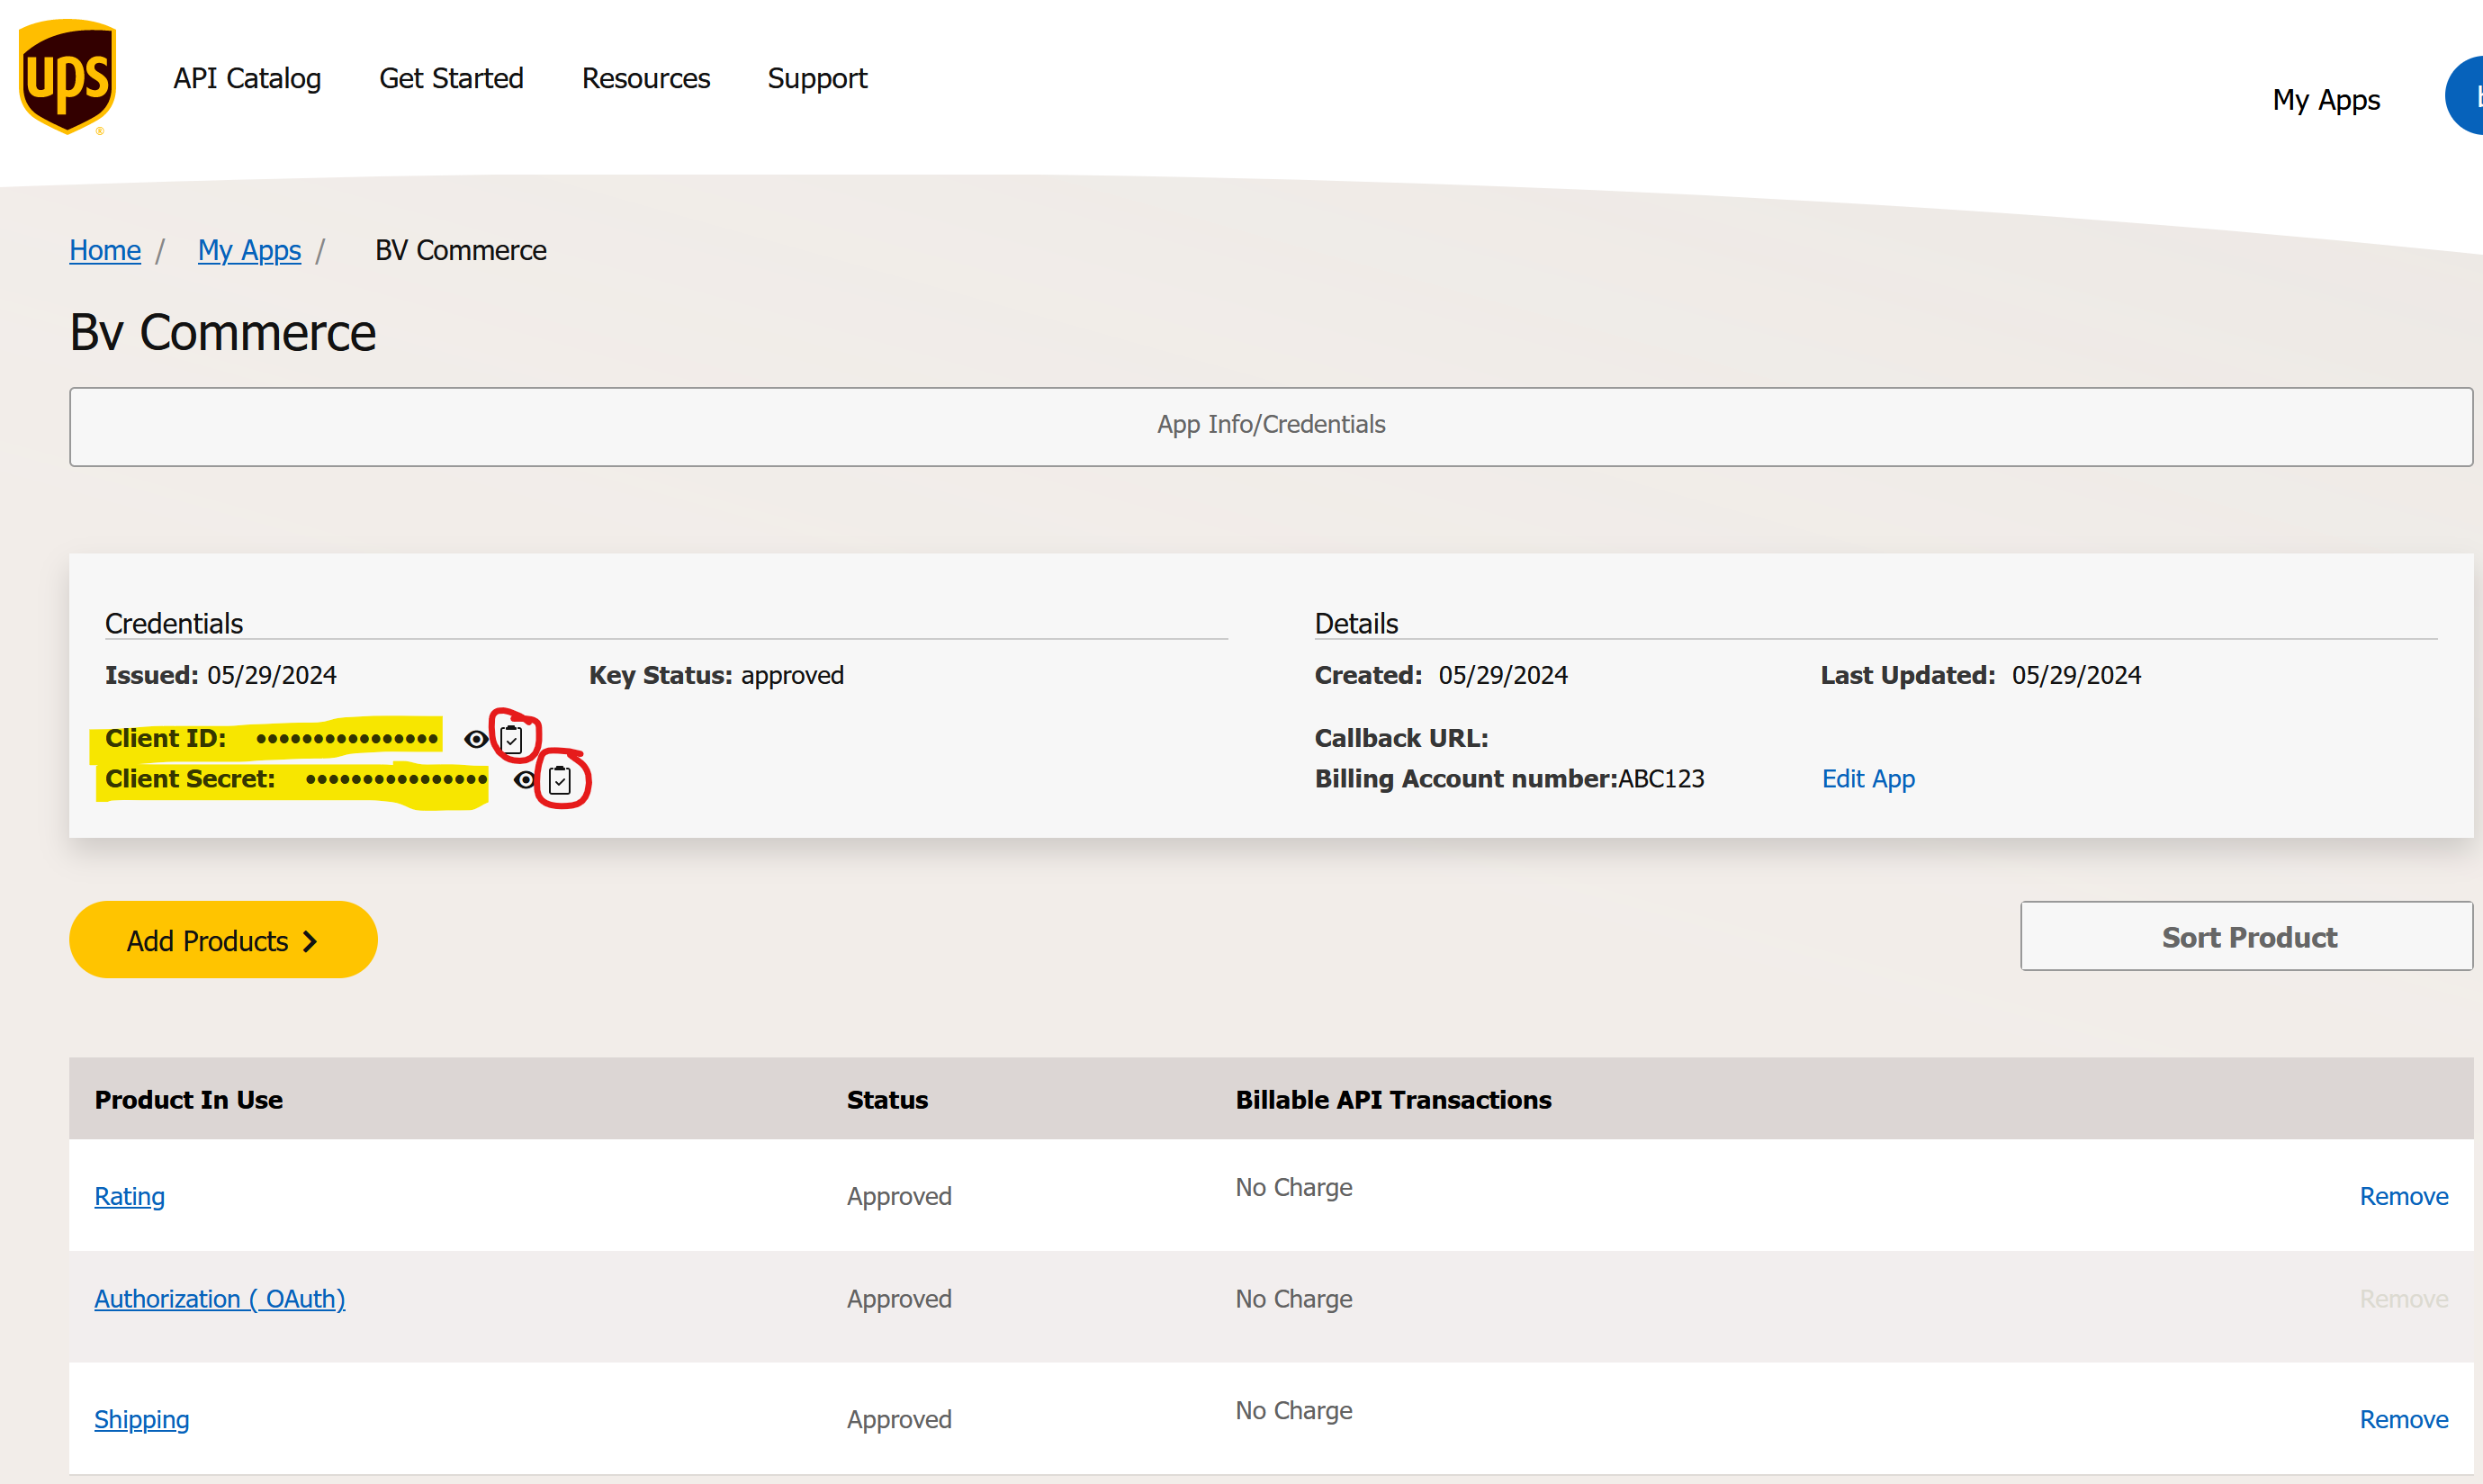
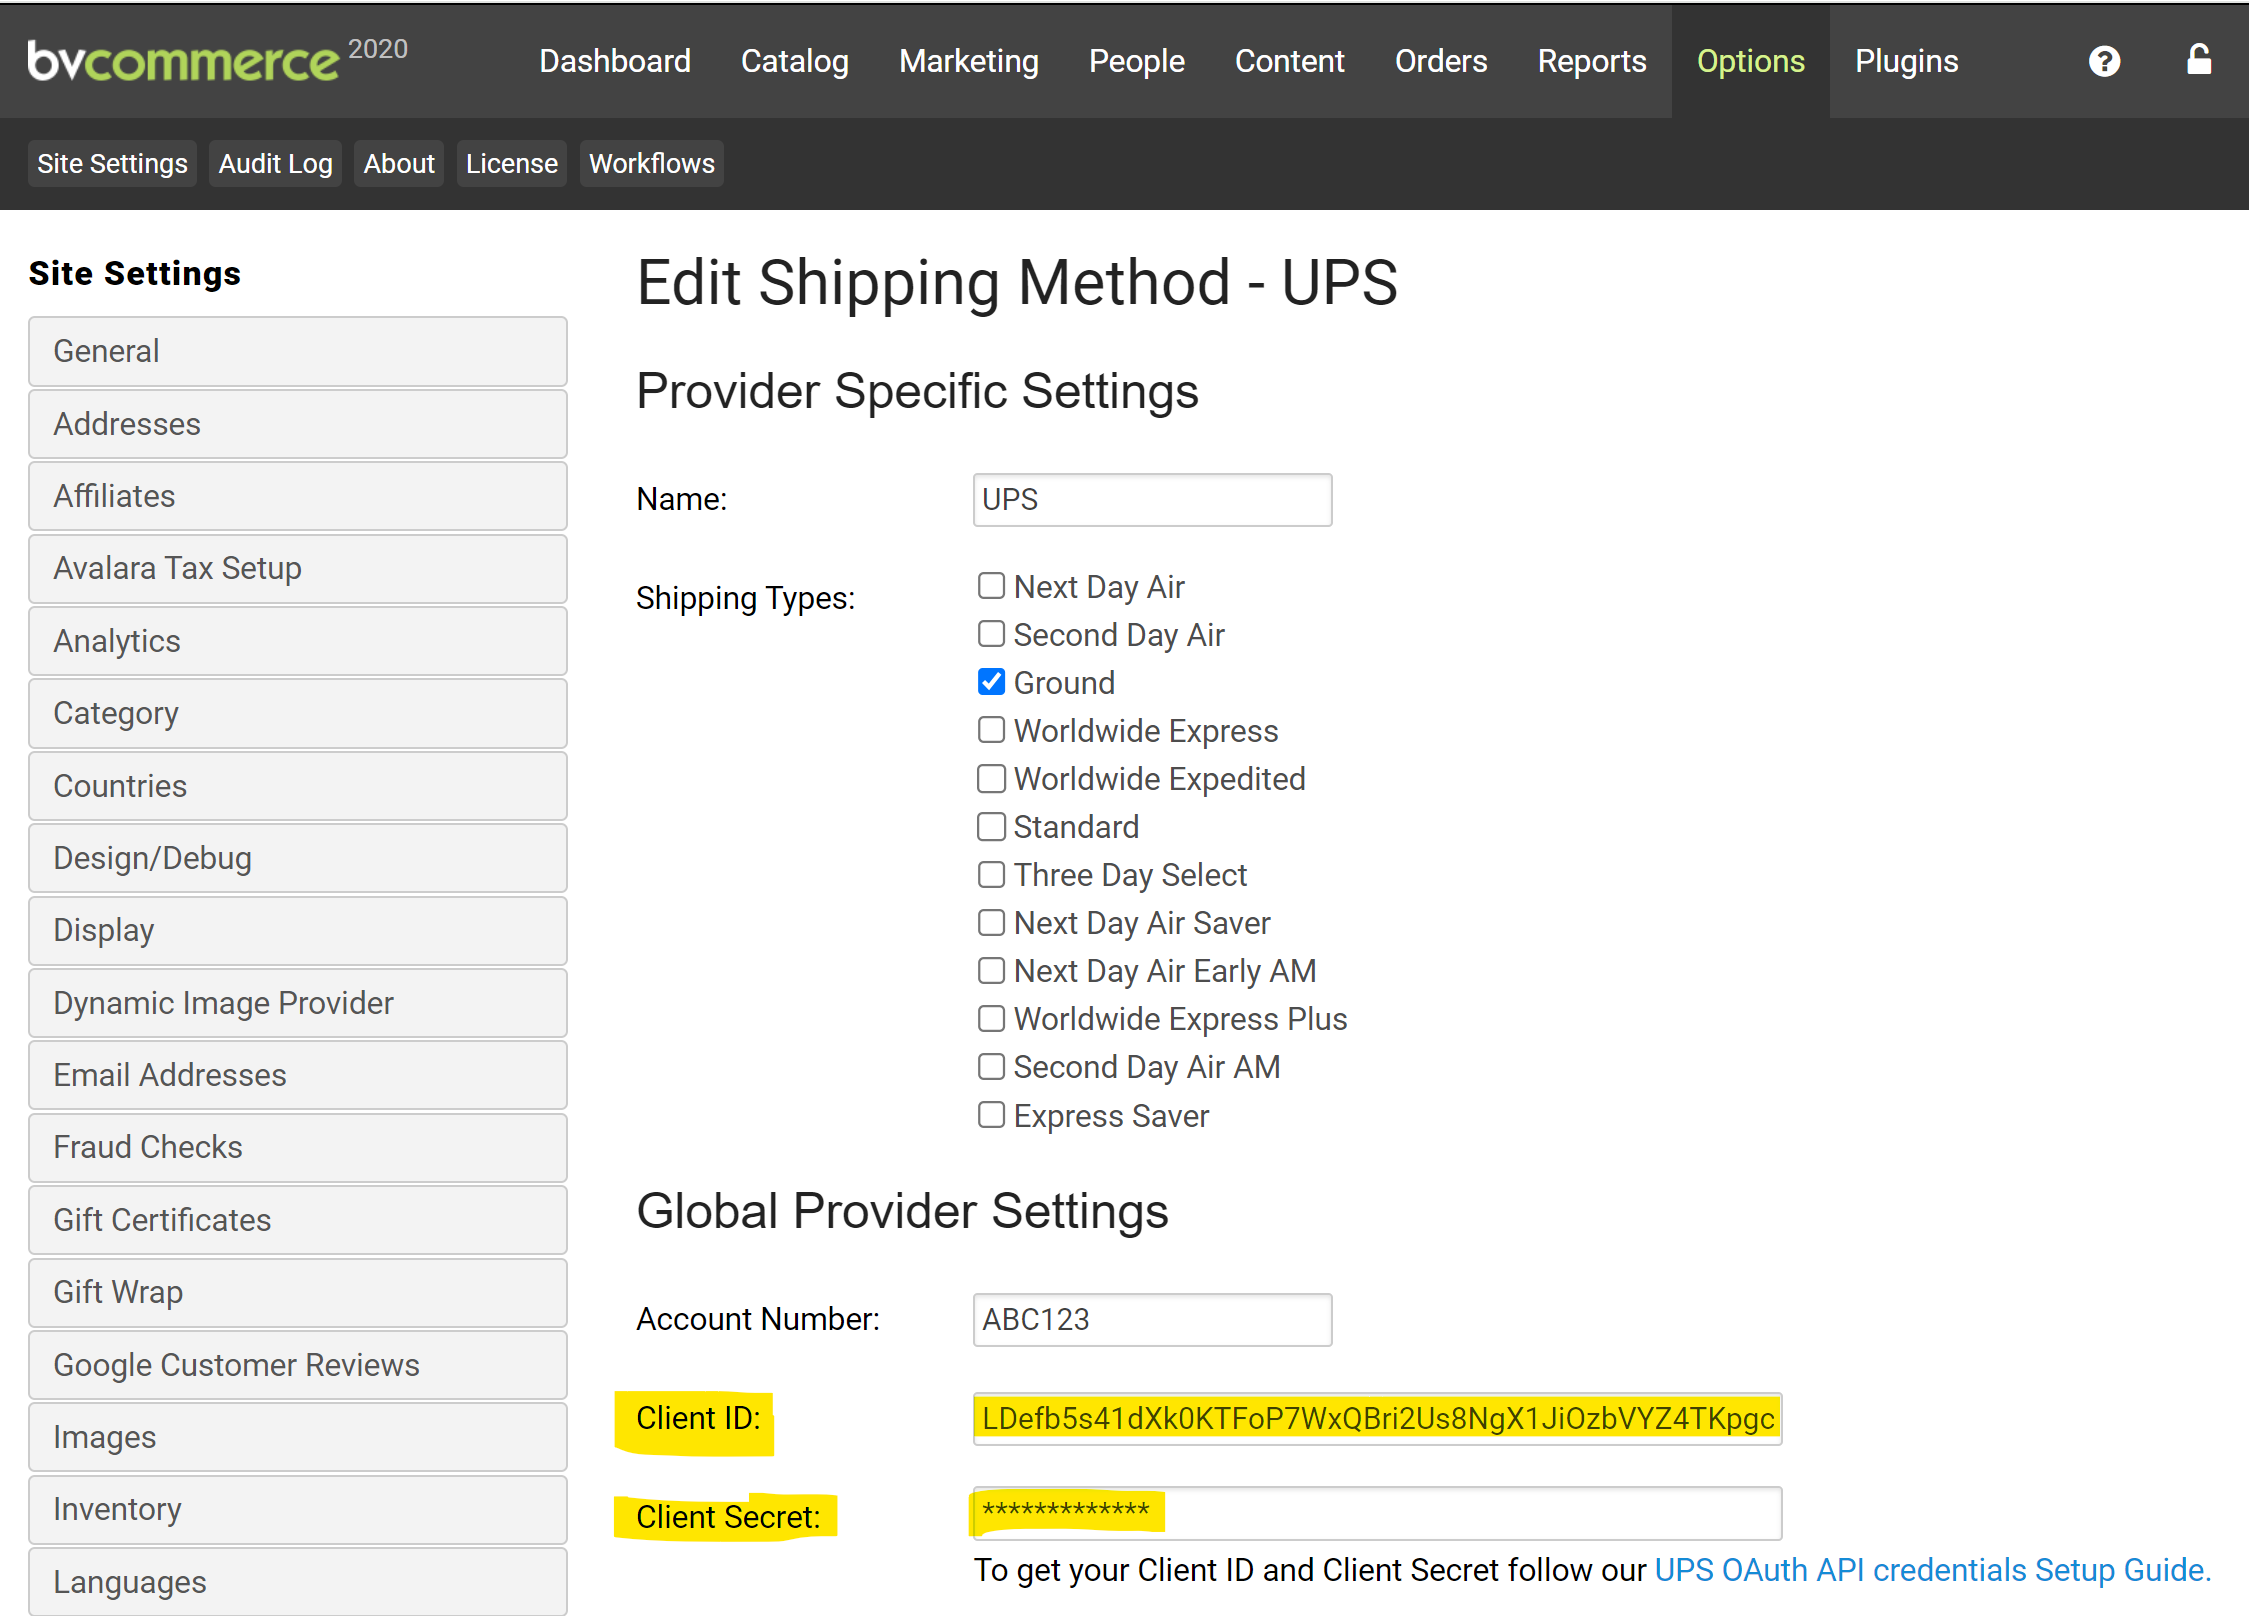
Log into your BV Commerce store admin and go to the Options menu at the top and click "Site Settings". Scroll down and click "Shipping Methods" in the left-column menu. Click the Edit button next to the first UPS shipping method you find or, if you haven't setup any UPS shipping methods, select "UPS" from the dropdown menu at the top of the page and click the New button. Copy/paste the Client ID and Client Secret from the UPS site into the appropriate fields (see screenshot below). You may then configure the remaining settings for the shipping method as needed. Be sure to click the Save button when complete.
