Posted by Aaron on January 14, 2016
Comments (0)
Connecting ShipStation to your BV Commerce 2015 SP2 (or above) store is a simple three-part process that can be completed in a few minutes. There is no interface to ShipStation in the BV Commerce admin. Instead, ShipStation communicates directly with your BV Commerce store, silently downloading orders and adding tracking numbers in the background.
These instructions assume that you have already have a ShipStation account. If you don't have an account you can sign up for a free 30-day trial at www.shipstation.com.
Part I: Setup a BVC user account for ShipStation
The BV Commerce user account that you use for ShipStation must have the Order Edit permission. While you could certainly use any admin account with this permission we recommend creating an account with only these permissions. By following the steps below this account will not even have access to the admin so if the account credentials are compromised the security implications are reduced.
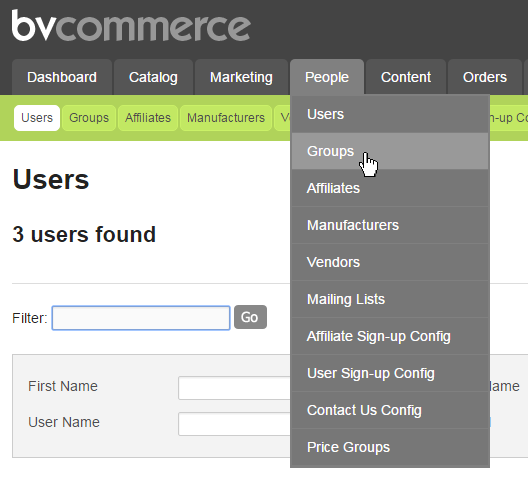
- In the BVC admin go to the People >> Groups page.
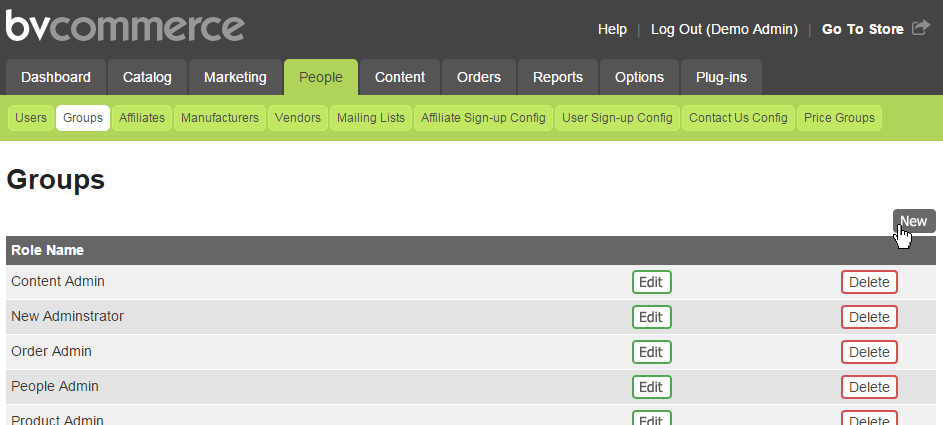
- Click the New button in the upper-right corner of the page.
- Enter "ShipStation" into the Group Name field and assign the Order Edit permission to the group by selecting it in the Available Permissions list and clicking the left 'arrow' button next to the list. This will cause the Order Edit permission to appear in the Assigned Permissions list.
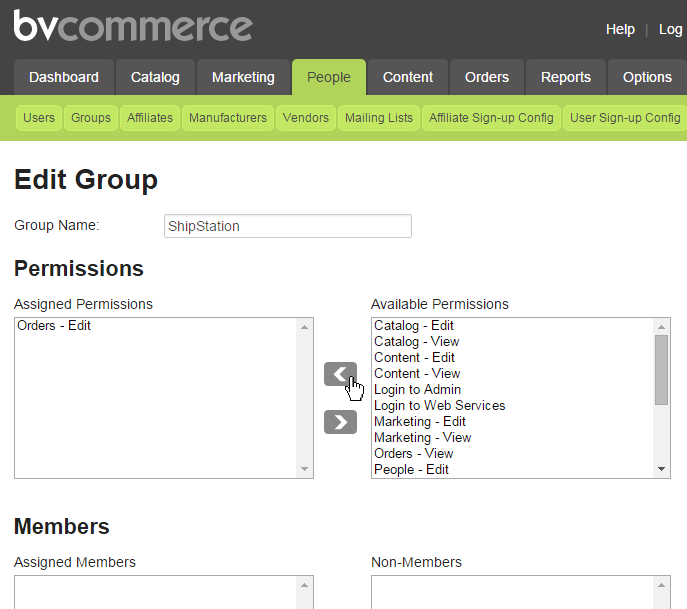
- Click the Save button to finish setting up the Group.
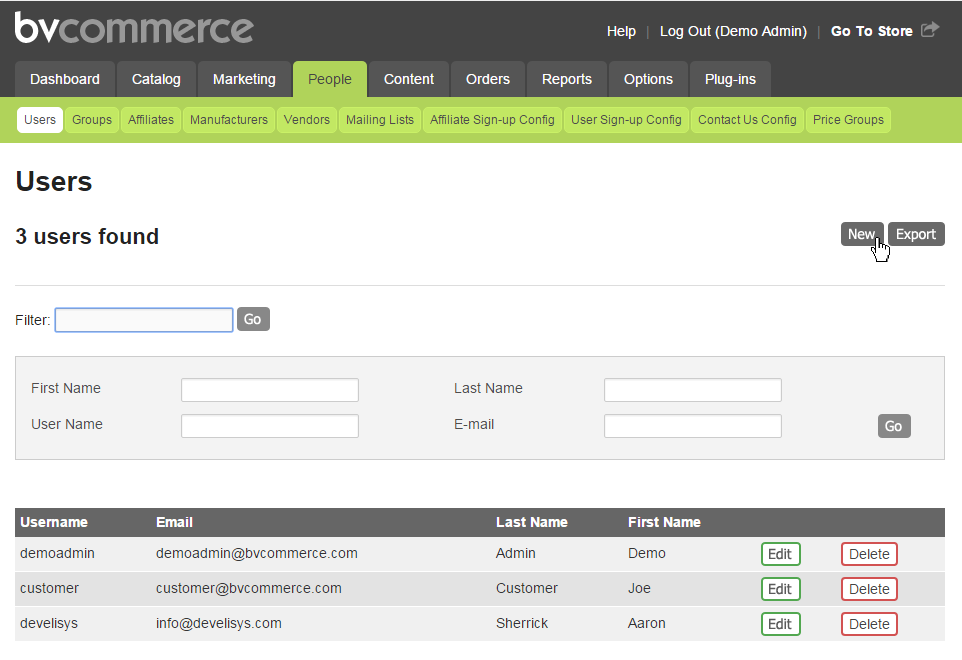
- Go to People >> Users page.
- Click the New button in the upper-right corner of the page.
- Enter a username, first name, last name, and password for the account. Be sure to note the username and password that you chose since you will need to enter this information in the ShipStation software setup in Part III of the instructions.
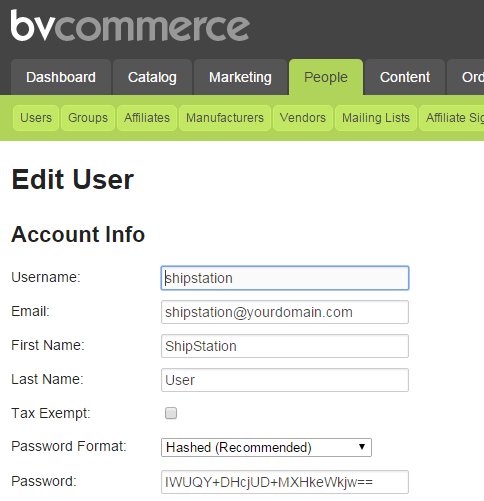
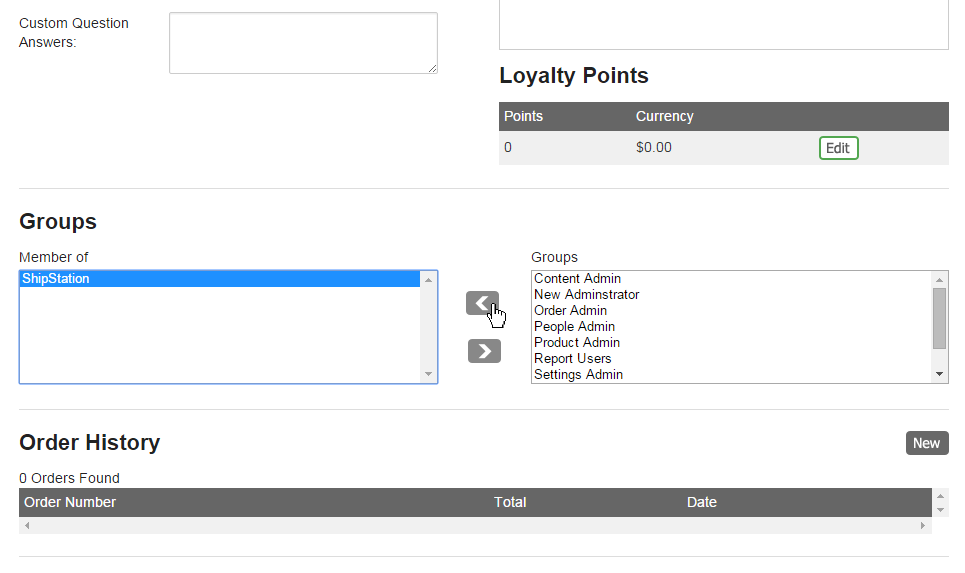
- Assign the ShipStation group to the user by selecting it in the Groups list and clicking the left 'arrow' button next to the list. This will cause the ShipStation group to appear in the Member of list.
- Click the Save button to finish setting up the user.
Part II: Setup a Cancelled or Voided BVC order status
For ShipStation to recognize that an order has been cancelled or voided it cannot be deleted from BV Commerce. Instead the status of that order should be changed. Out of the box there is no cancelled or voided order status. However, since BVC allows the creation of custom order statuses this may be something that has been added to your store. If not, you will need to add it.
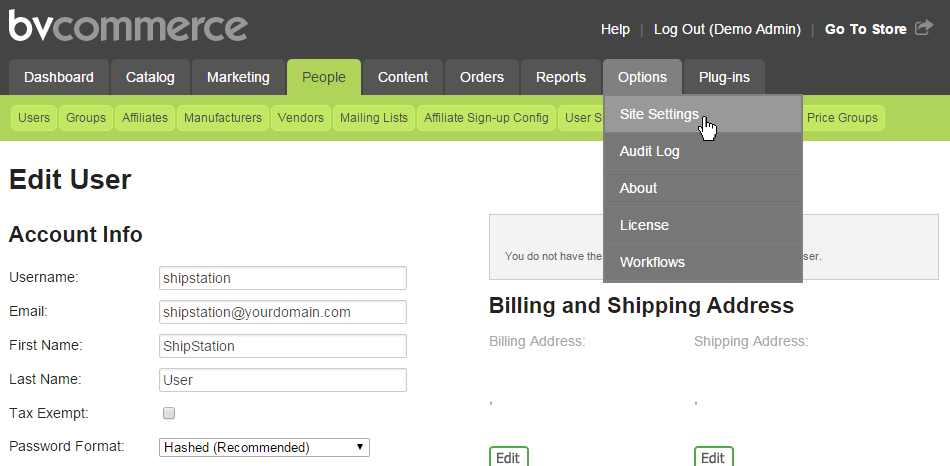
- To check your order statuses, go to Options >> Site Settings in the BVC admin.
- Click Orders in the left menu and then click the "Click Here to Edit Order Status Codes" text link at the top of the page.
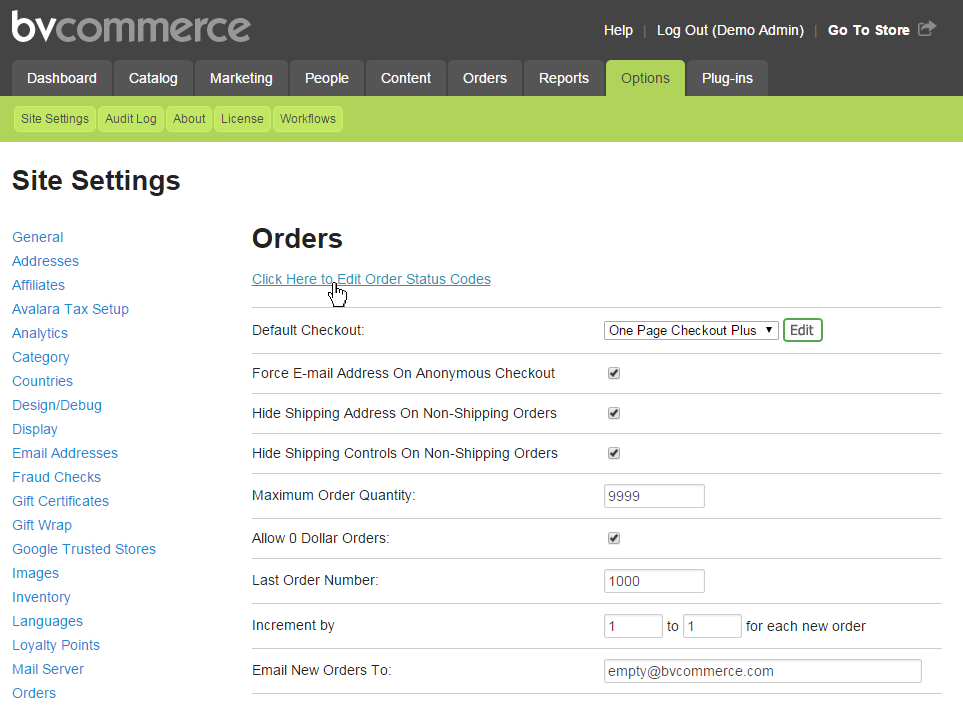
- The screenshot below shows the default order statues. If you do not see a status called something like cancelled or voided enter "Cancelled" in the Status Name textbox at the top of the page and click the New button.
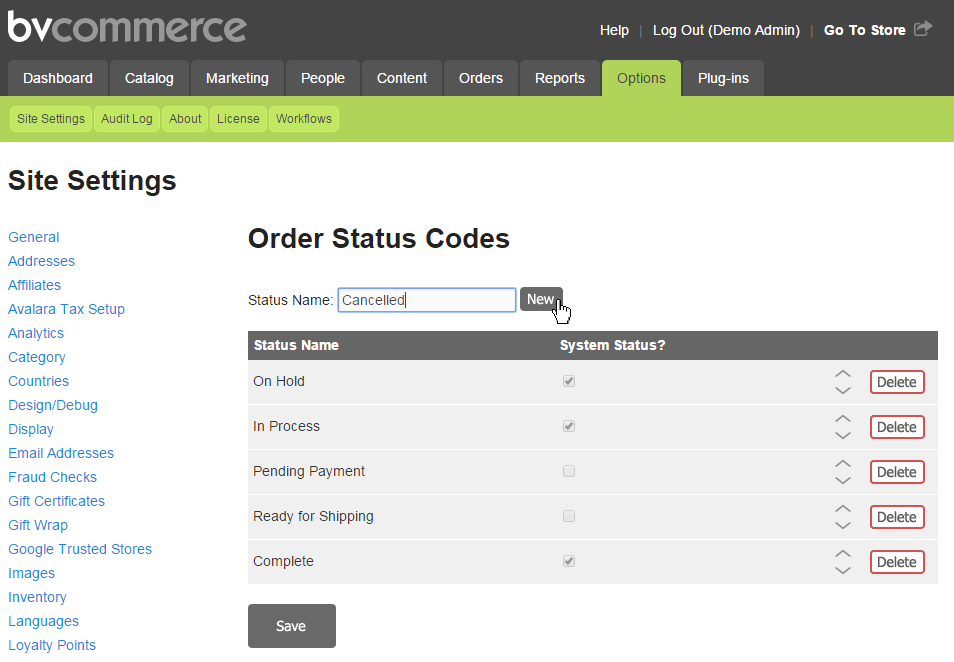
- Click the Save button to finish setting up the order statuses.
Part III: Connecting ShipStation to your BVC store
In this final part you will connect ShipStation to your BV Commerce store and map the BVC order statuses to ShipStation's order statuses so that only orders that are ready for shipping are downloaded (and orders that have been cancelled or voided are removed).
- Log into your ShipStation account.
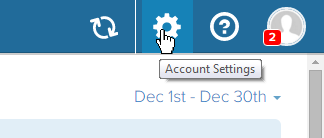
- Click the gear icon (Account Settings) in the upper-right corner of the page.
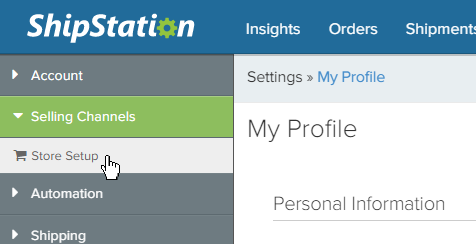
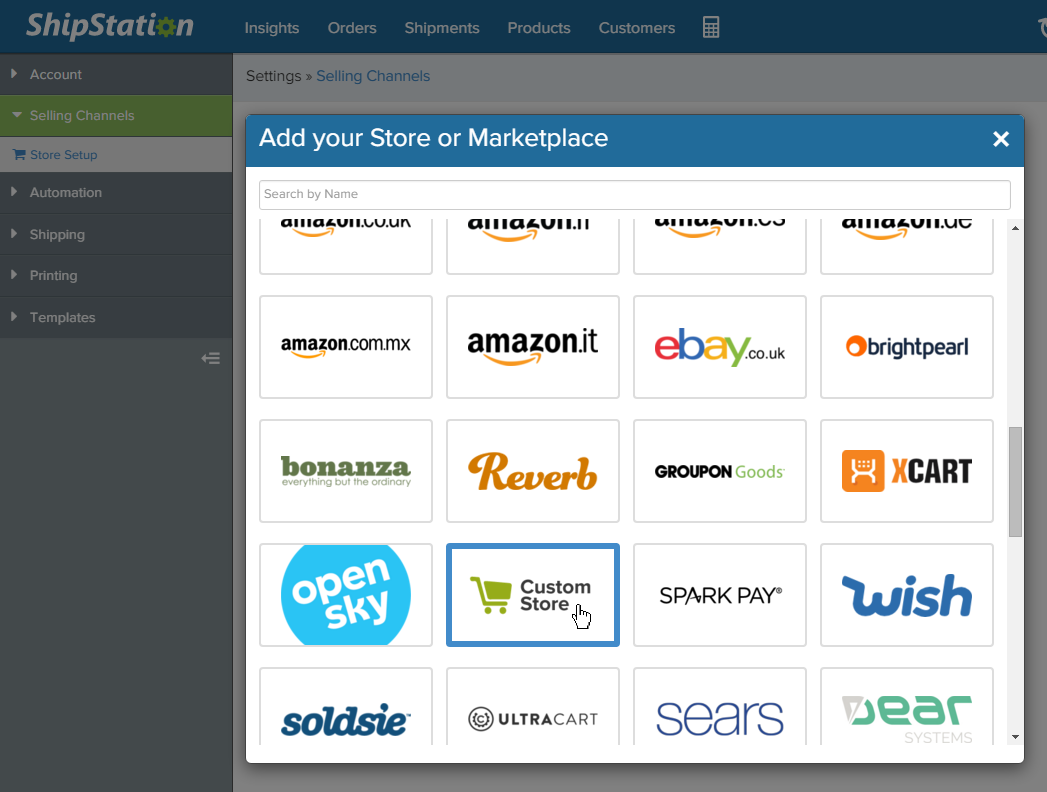
- Click Selling Channels in the left column menu and then click Store Setup.
- Click the green "Connect a Store or Marketplace" button
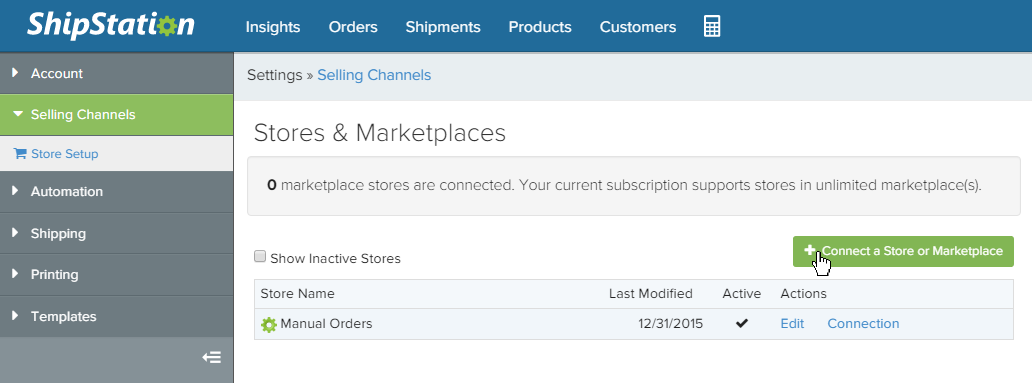
- Scroll down the pop-up window until you find the Custom Store option and click it.
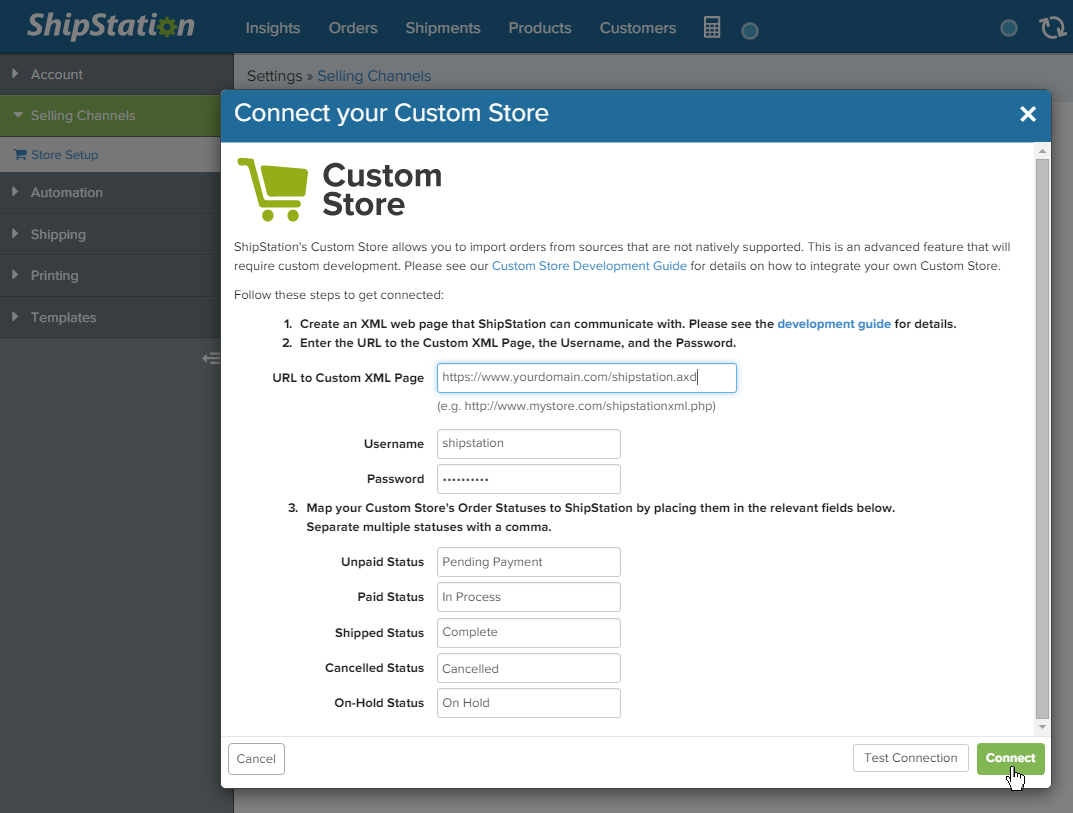
- For the "URL to Custom XML Page" field enter the complete URL of your website, including https:// at the beginning. Then add "/shipstation.axd" (no quotes) to the end of your website's URL. This is the special URL that ShipStation uses to communicate with BV Commerce.
Enter the username and password for the BVC account that you created in Part I.
For a BVC store using the default order statuses, map the order statuses as shown in the screenshot below. However, if you have special order processing statuses you can alter the mapping as necessary. Note that you can map multiple BVC statues to a single ShipStation status by separating each status with a comma.
Click the green Connect button to finish connecting your store to ShipStation. If you receive any connection errors verify the website URL and that the username & password are valid.
For ShipStation support please visit https://help.shipstation.com.