BVC 5 - PayPal Express Setup
PayPal Express Setup
In this tutorial, we’ll discuss how to set up your BV Commerce 5 store with PayPal Express.
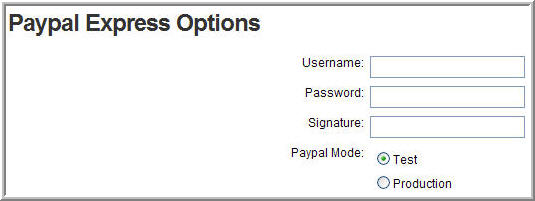
The screenshot below displays the BV Commerce 5 PayPal options page. You can find this page under Options > Payment > PayPal Express > Edit.
To begin, open a browser window and log-in to your PayPal account. If you do not have a PayPal account, you’ll need to signup or register for one.
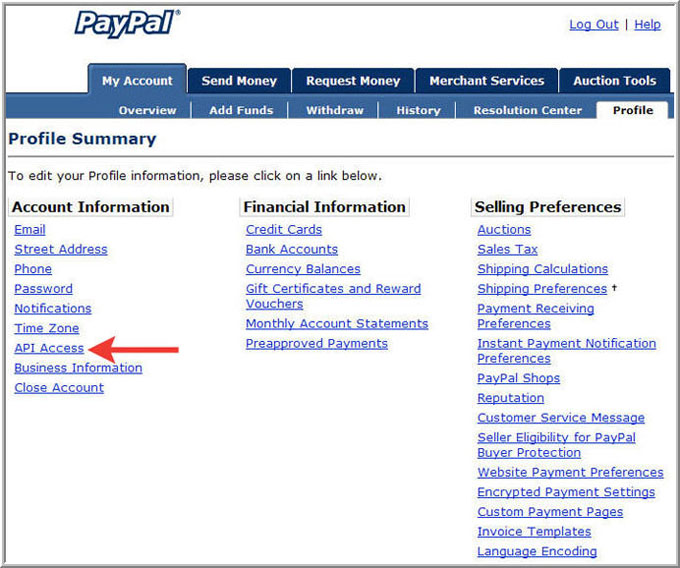
Navigate to the “My Account” main menu and “Profile” sub tab. Select “API Access”.
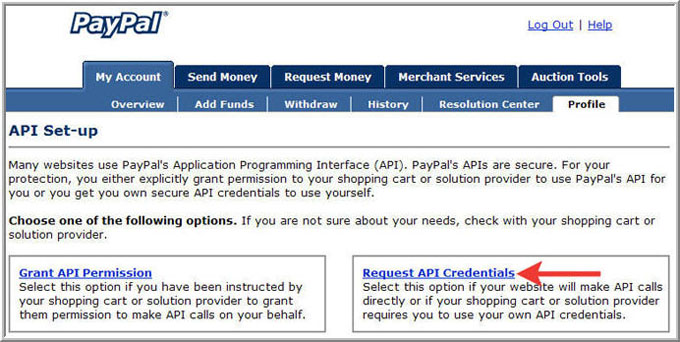
From the "API Set-up" screen, select "Request API Credentials".
On the "Request API Credentials" screen, leave the API Signature radio button option selected. Make sure you read the agreement carefully and select the "I Agree" checkbox. Click the "Submit" button.
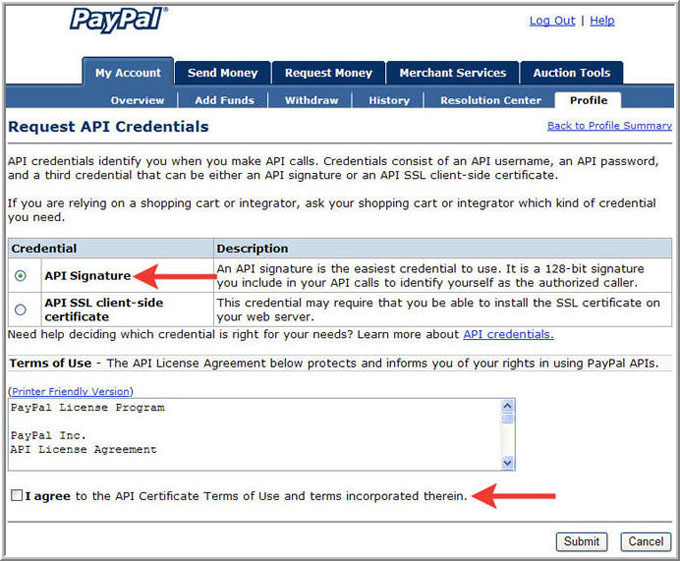
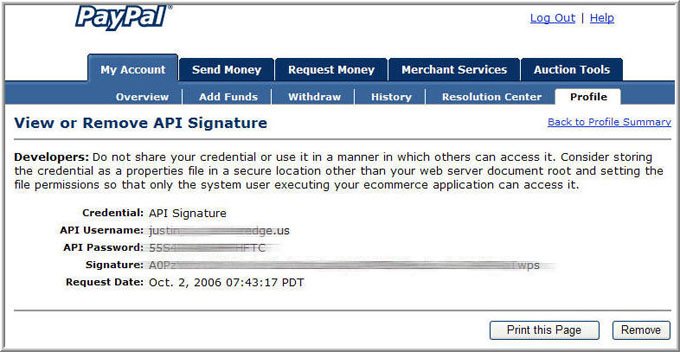
The next screen provides your API Username, Password, and Signature. Copy and paste this information into the BV Commerce 5 PayPal Express options page. Make sure you change the “PayPal Mode” on the BV Commerce 5 options page to “Production”.
 The PayPal username/password credentials are first created when the application starts. Therefore the application needs to be restarted once the new username/password combination is saved. Upon saving your PayPal Express username/password combination, it is recommended that you recycle your website.
Follow the steps below to recycle your website:
Shared Hosting Environment:
- FTP into your site using the FTP connectivity information provided by your hosting company. You may also use a control panel if your hosting company provides one.
- Download the file named “web.config”. This file will be located in your stores root directory.
- Locate the following line:
- Change the first “false” to “true” and save your changes.
- Next, upload your “web.config” file back to your server and overwrite the existing copy.
- Afterwards, re-download the “web.config” file. Revert and save your changes (change the true back to false). Upload the file once more and overwrite the existing copy.
Other:
- Open the “web.config” file located in your stores root directory.
- Locate the following line:
- Change the first “false” to “true” and save your changes.
- Revert your changes and save the file again.