BVC 5 - Additional Images
Each product can be displayed with an unlimited amount of images.
Images are uploaded and saved to the Products folder within your web store. ASPNET
user (Windows 2000) or IIS_WPG user (Windows 2003) must have Write permissions to
upload images.
To ensure fast image browsing, it is recommended that images be uploaded to logical
folders limiting the number of images in one folder.
Additional Images will appear when a customer clicks the “More Pictures” button
when viewing a product.
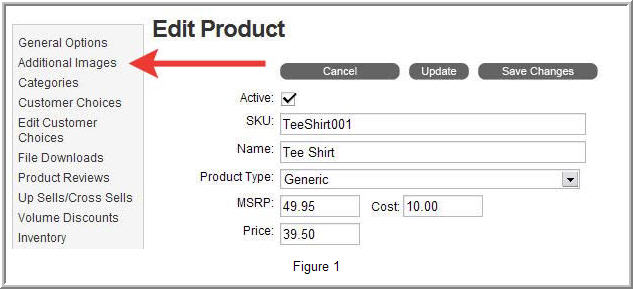
Adding Additional Images
Select the “Additional
Images” link in the left menu when creating a new product or editing an existing
product.
Click the "new" as display below in Figure 2 to add a new additional image.

You can manually enter the image path in the “File Name” field or use the “Select”
button to browse for an image. The “Caption” defines the text that will appear below
an image when displayed on the site. The “Alternate Text” is displayed when hovering
over an image with a mouse cursor. Alternate text is also displayed in place of
an image if the customer has image viewing turned off in their browser.
Clicking the “select” button opens the image browser as displayed in Figure 3 below.
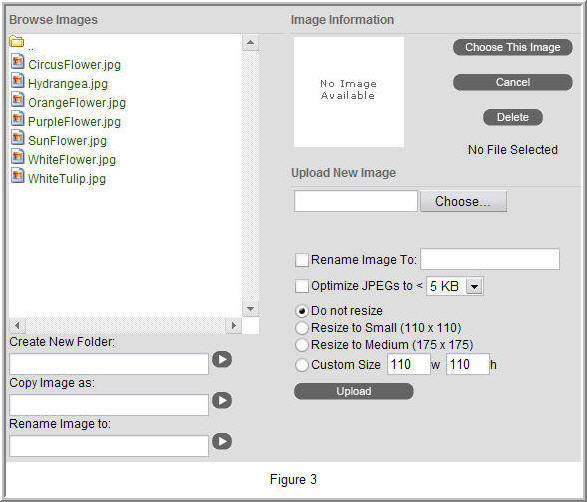
Let’s discuss each section of the image browser.
Browse Images
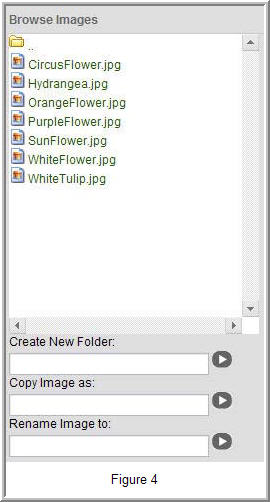
The Browse Images section displayed in Figure 4 will show all images in a selected
folder.
Use the folder icon at the top of the window (followed by two periods “..”) to navigate
up or back a folder level.
Other options include creating a new folder, copying an image or renaming an image.

Incorrect permissions may result in
an error on this page. If you receive an error when trying to create, copy or rename
a folder, contact your hosting company and verify the permissions listed earlier
in the article.
Image Information
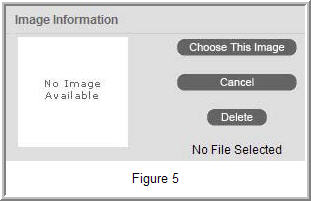
The Image Information section displayed in Figure 5 shows a preview of the selected
image. You can choose this image, cancel or delete the selected image.
Selecting “choose this image” will add the selected image as an additional image.
Upload New Images
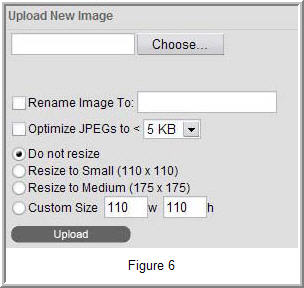
Click the “choose” button to select an image from your local drive.
If you would like the image to display in the source file size, click the upload
button. Options are available to automatically resize and optimize the image for
you, making it easy to create consistently sized images.
Depending on the setting in the Options > Images area, images will be forced to
the defined sizes or displayed in the source file size.
If desired, choose the option to rename the image. Careful planning will help in
keeping your store organized and it is recommended to rename files such as "book_small.jpg"
"book_main.jpg" etc. When the properties have been set, click the upload button.
The image will be displayed in Image Information preview window, click the "choose
this image" button to use this image.